


How to configure Autoscale for App Services in Azure
One of the top features of Azure could is the capability of elasticity. When your application receives more traffic than expected, Azure can automatically scale its resources to meet those needs and when the traffic reduces, it can scale back to reduce the costs.
In Azure scale up and down means increasing or decreasing the infrastructure capacity of your server while scale out and in means increasing or decreasing the number of instances of the server that run our application.
In this article, we will configure auto-scaling for Azure App Services Web App based on conditions.
Step 1: Open an existing Azure Web App and on the left panel navigate down and select Scale-out. (You have to make sure, your App service plan has autoscaling, else you have to scale up first to a plan that supports autoscaling)
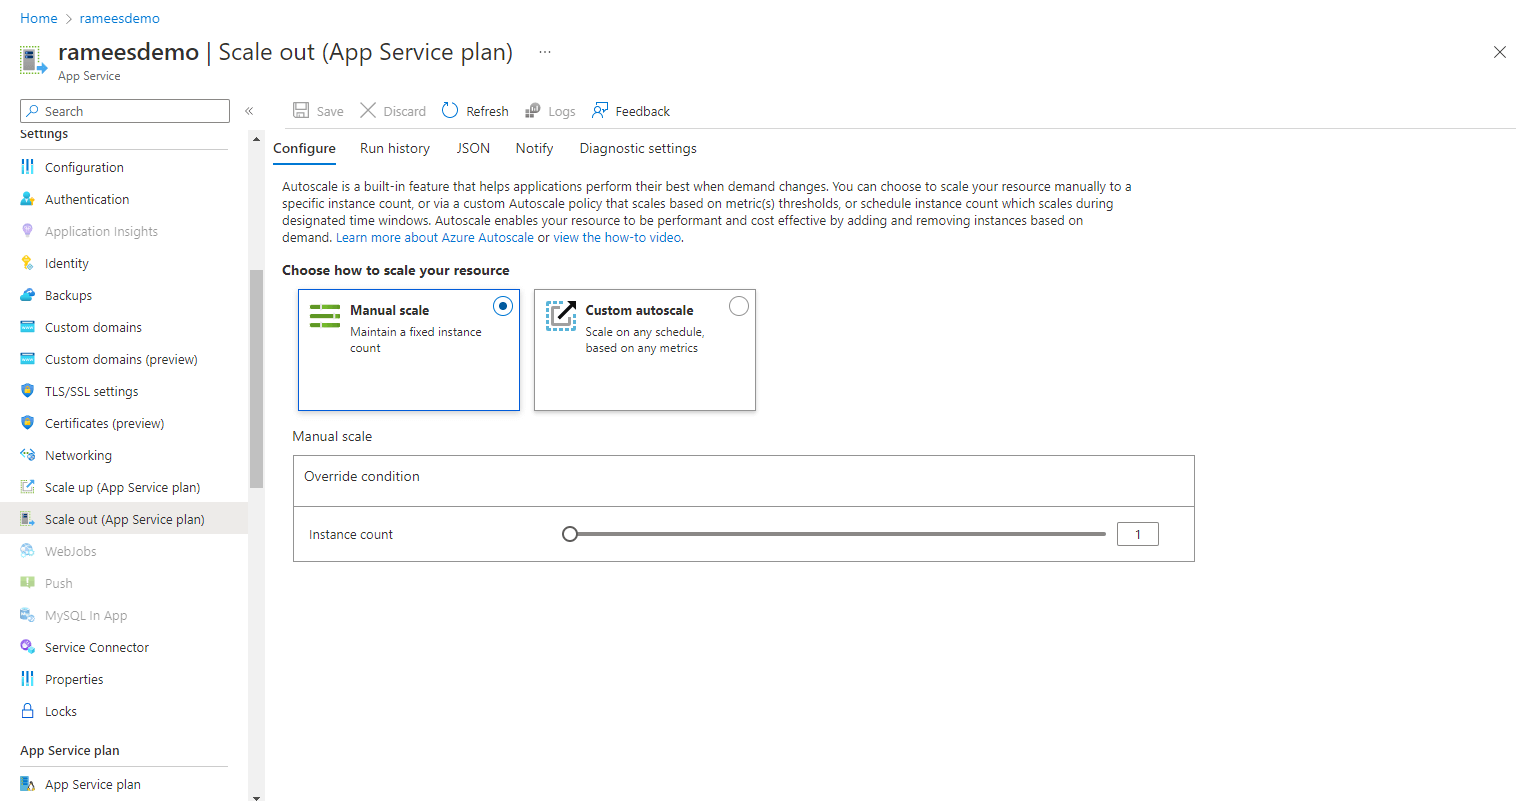
Here you can see two options, one is the manual scale which by default will be set to 1 instance, which you can increase or decrease using the slider and keep your number of instances to a static number manually. The other option is Autoscale, which you can scale based on a metric.
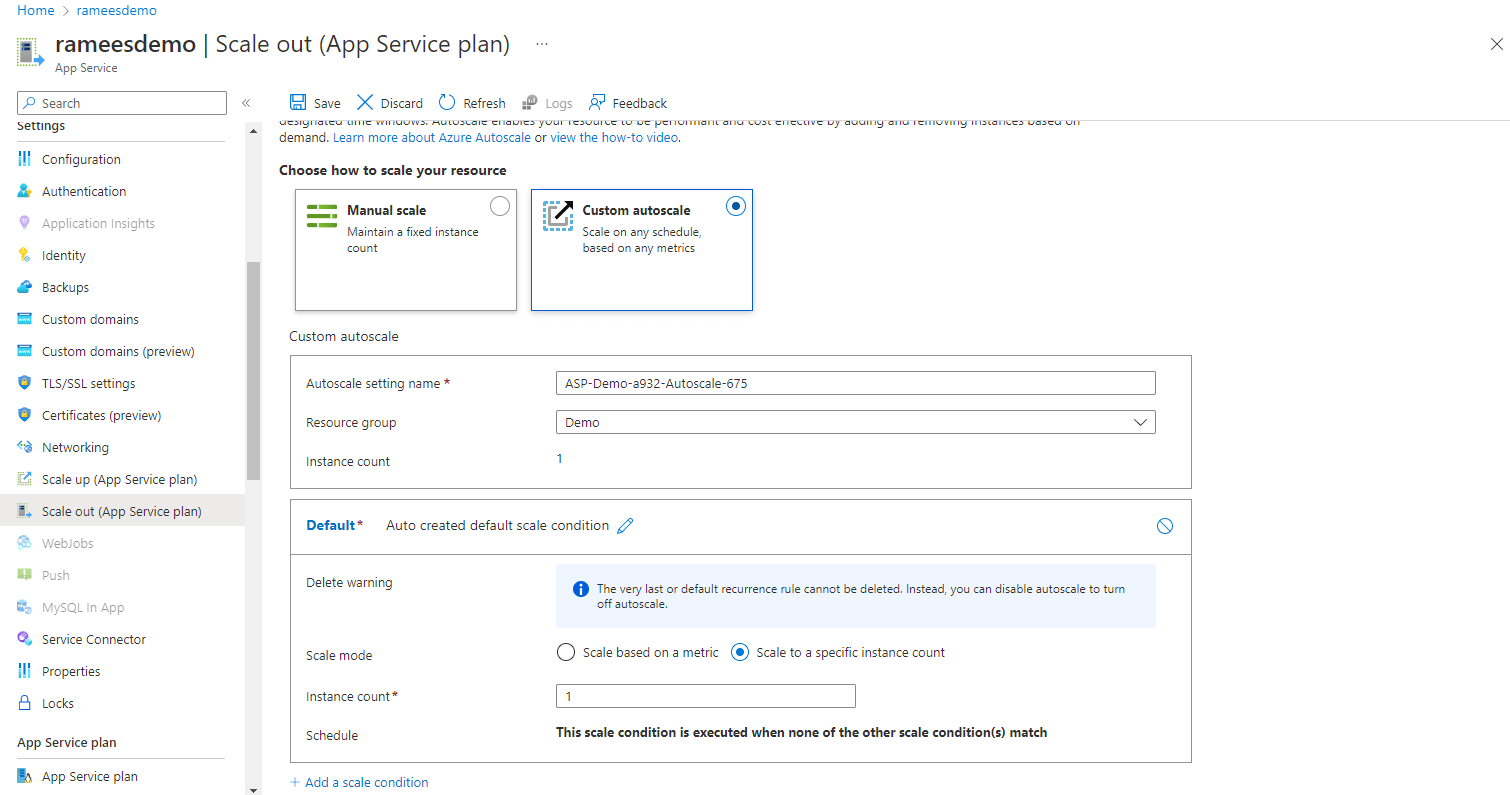
Step 2: Select Custom Autoscale, Set a Name, and Resource Group, and define your condition.
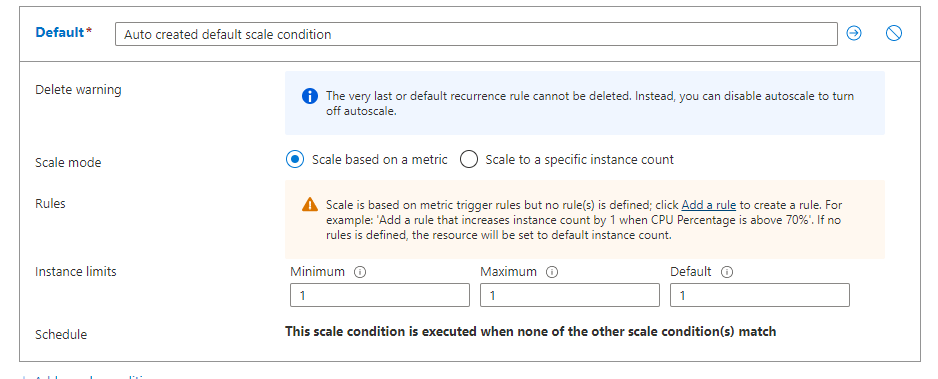
Step 3: To define a sample condition based on a metric, select the option Scale based on metric and click on “Add a rule”
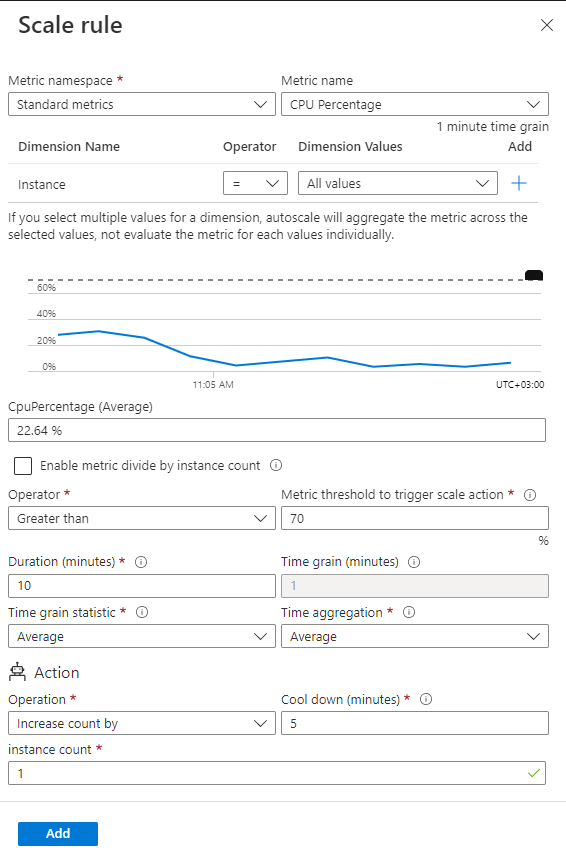
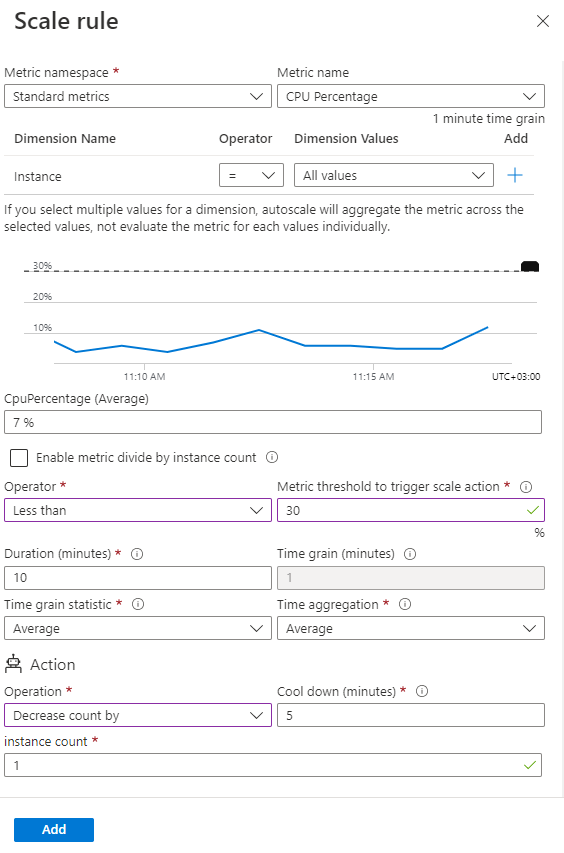
- Select the Metric name, Here am choosing CPU Percentage as an example. On selection of any metric, it will show the graph of the metric value for the last ten minutes.
- Next, set the “Metric threshold to trigger scale action”. Here will set 70 as an example, and the duration as 10 minutes, which means, if the average CPU percentage of the web app is more than 70% for 10 minutes, the defined scale condition will trigger.
- Next, define the action by setting the Increase count. Here I am defining 3 to increase the count and cool down time to 5 minutes. which means when the condition is met, the web app will increase the number of instances to 3 and will not execute the same action for the next 5 minutes (the cooldown time)
- Once you have done this, click Add
Step 4: You are also having an opportunity to set the maximum, minimum, and default instance limits. Here I am setting the maximum to 4
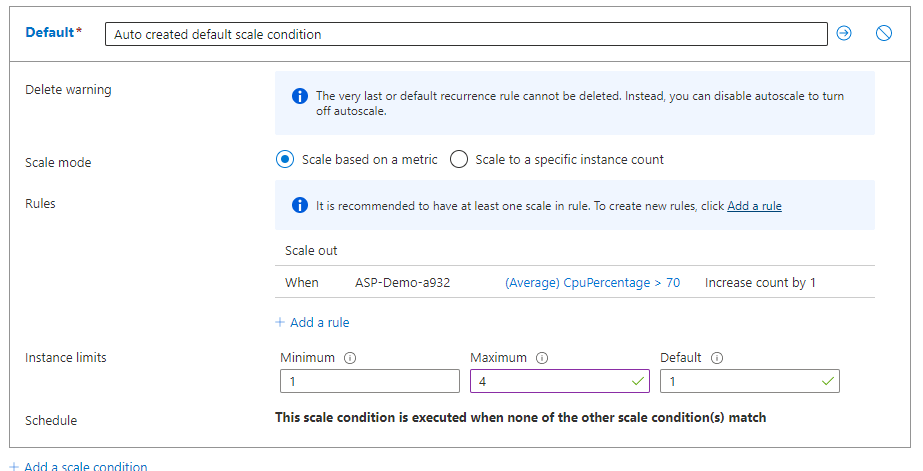
Step 5: You can also define another rule to scale down when the resource usage is low, for example, we can write another rule to decrease the instance count by one if the CPU percentage is less than 30%
Step 6: Click Save to save the scale conditions
